Create Vendor
Use create vendor screen to create vendor records. A vendor can be a person or business who supplies goods or service to your company. If any of your vendors has got a different billing and ship from address then create a separate record for each and you must create the Pay-To vendor record first.

Navigation : From main menu select ‘Customer & Vendor’ and then click on ‘create vendor’. Enter required details and then click on SUBMIT. New vendor record will be created successfully.
Create Vendor Screen :

Enter the vendor name here. Vendor name should be unique. You can not keep multiple vendors with same name . If you have two vendors with same name ABC Ltd., then you can create these vendors as ABC Ltd Singapore and ABC Ltd. Australia but not ABC Ltd for both of them.

Enter the email address to communicate with vendor over the email. Now a days most of the companies send and receive their invoices, statement through email.

Phone number for vendor.

Enter the complete mailing address for vendor.

Please enter vendor’s VAT or TIN number whichever is applicable for this vendor. If you do not have any information to enter on this screen, then you can keep this field blank.

Please enter vendor CST number here if applicable.
If your vendor has same address for shipping and billing, then this field is not applicable for you and you can ignore this field while creating a vendor record.
If your vendor has got different addresses for billing/payments and ship from and also they treat them as different branches then you will have to create two vendor accounts for them. One is Pay To and another one is Ship from. We suggest you to create Pay to vendor ID first.
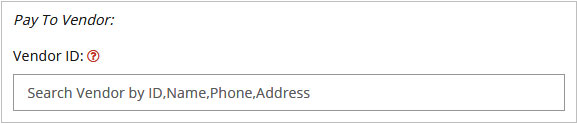
Keep this field Blank when you are creating a Pay to Vendor.
Keep this field Blank when your vendor is both ship from and pay to.
Select the vendor ID on this field when you are creating a ship from vendor and you need to tag it with a pay to vendor account ( please type *.* and select the Pay To vendor from pay to vendor list or you can type the name to select the correct vendor)

This field is only applicable for multi branch company and if you want to restrict the vendor access through particular branch. You can select that vendor accessible branch on this field.
For single branch company default branch name will automatically appear here.
Ignore this field if you are a single branch company.
If you are a multi branch company and you want to access this vendor from all your branches, then please select ALL from drop down.
Select the branch name if you do not want to access this vendor from all your branches.

Product line is made up with group of similar products for various reasons.
(Read create product line help doc for detail information on product line)
Please select the product line name from drop down option.

Please select the vendor currency from currency list.
Vendor Default Payment Method :
Cash / Check/ CC/ EFT
Please select the payment method which you will be using while paying the vendor as that’s their requested payment receiving method.

Please enter vendor GST number on this field.
Note : Fields which are marked as * are mandatory . If you keep any of these fields blank while creating new user record, system will display error message saying that field is required.
Use manager vendor screen to edit/update vendor records.
Related Links:
Create Customer
Manage Customer
Customer Wise Sales Summary
Manage Vendor
Vendor Wise Purchase Summary